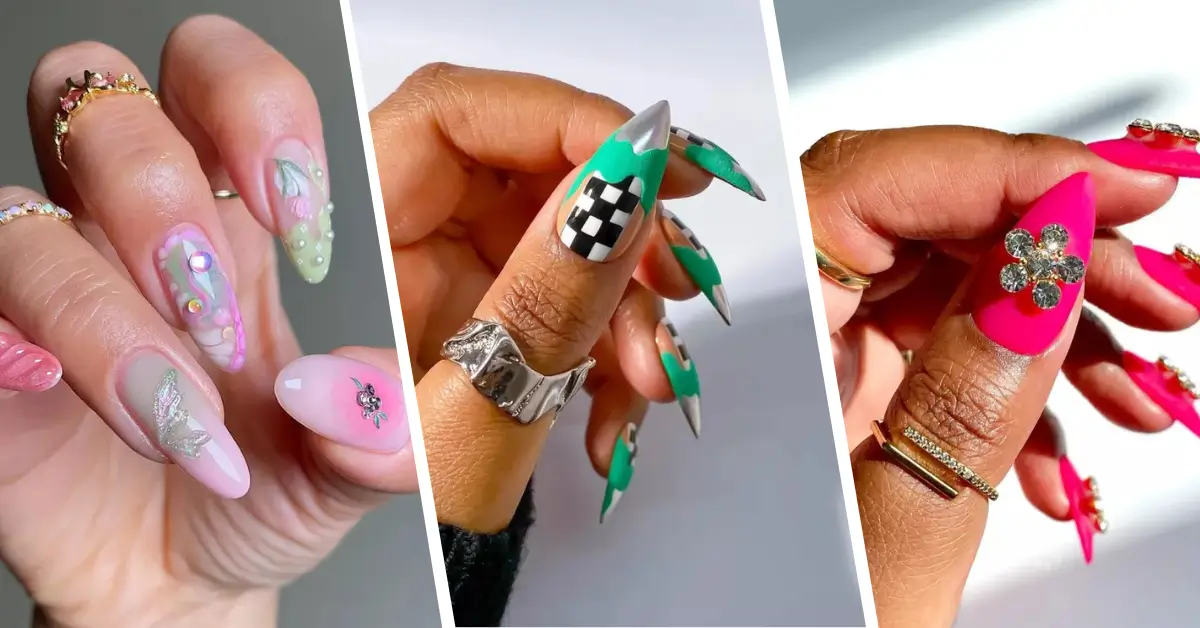
21 Easy Spring Nails Designs to Brighten Your Season 2025
Winter’s chill is finally giving way to longer days and warmer temperatures, signaling the perfect time to refresh your manicure with colors and designs that celebrate the season. easy spring nails should capture the essence of renewal, with fresh colors, delicate designs, and an effortless approach that anyone can achieve at home.easy spring nails. Whether…
Winter’s chill is finally giving way to longer days and warmer temperatures, signaling the perfect time to refresh your manicure with colors and designs that celebrate the season. easy spring nails should capture the essence of renewal, with fresh colors, delicate designs, and an effortless approach that anyone can achieve at home.easy spring nails.
Whether you’re a nail art novice or simply seeking inspiration for your next at-home manicure session, these 21 easy spring nail designs will have your fingertips looking perfectly seasonal without the salon price tag. From subtle florals to playful pastels, each look can be created with basic tools and a little patience.easy spring nails.
01 of 21
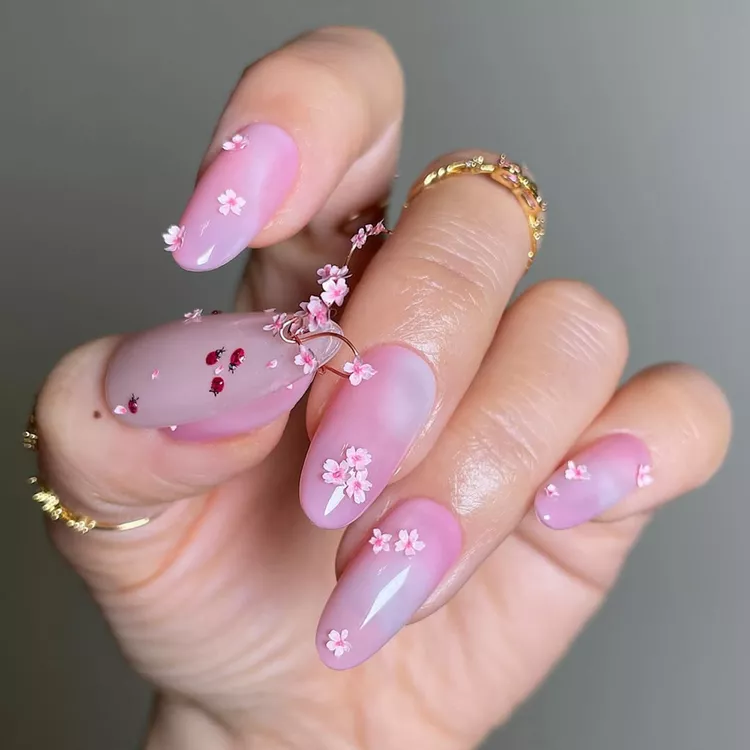
Sheer Cherry Blossom Nails

Embrace spring’s iconic blooms with a delicate cherry blossom design on a sheer backdrop. Start with a translucent milky pink base that lets your natural nail shine through. Once dry, use a dotting tool to create small clusters of five pink dots arranged in a flower pattern. Add tiny yellow centers with the tip of a toothpick, then connect the blooms with thin brown branches using a fine nail art brush. This design looks intricate but breaks down into simple dots and lines that even beginners can master.
02 of 21
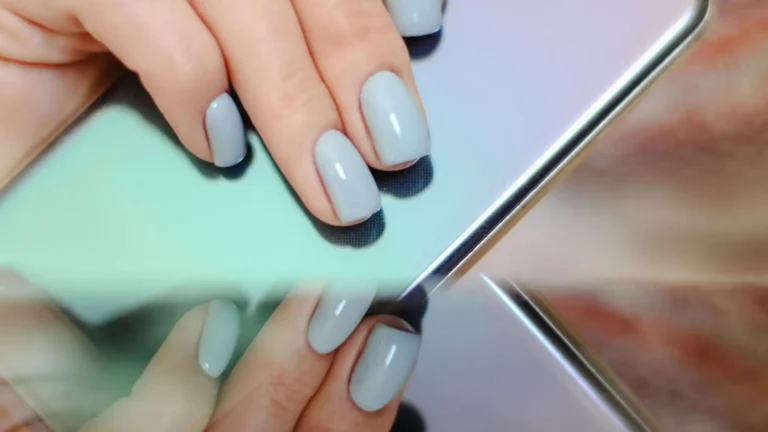
Iridescent Lavender Nails

For those days when you want elegant spring nails without complex art, an iridescent lavender polish delivers maximum impact with minimal effort. This cool-toned purple catches light beautifully, creating a dimensional effect that looks far more complex than a simple color application. Apply two thin coats for the perfect balance of color and shimmer. This trendy shade flatters all skin tones and complements spring wardrobes perfectly.easy spring nails.
03 of 21
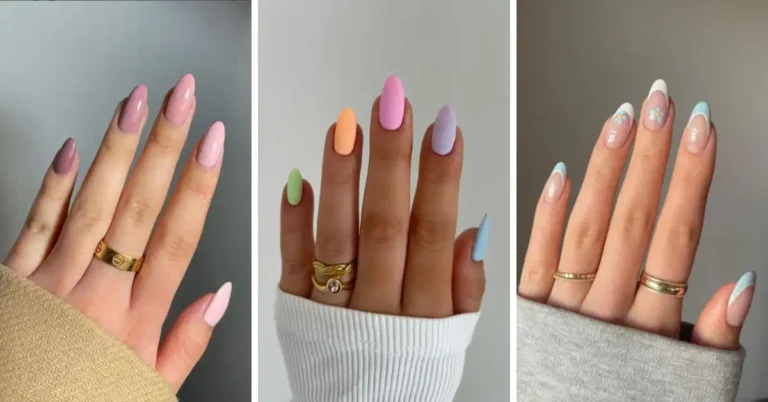
Pastel Skittle Velvet Nails

The “skittle” manicure—different colors on each nail—offers a playful spring look with zero artistic skill required. Choose five complementary pastels like mint, lavender, baby blue, pale pink, and soft yellow. For additional texture, use magnetic polishes that create a velvet effect, or add a matte topcoat to some fingers while keeping others glossy. This approach lets you incorporate multiple spring trends in one easy manicure.easy spring nails.
04 of 21
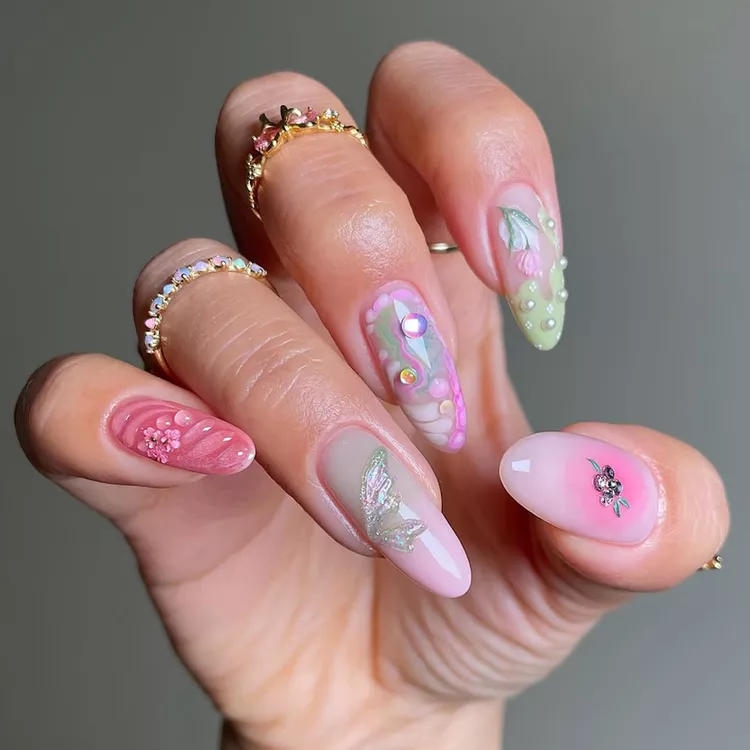
3D Sheer Watercolor Cherry Blossom Nails
Create dimension and depth with a watercolor effect that mimics spring’s translucent beauty. Apply a sheer white base, then use a small brush to dab diluted pink polish in flower shapes across your nails. While still wet, add a drop of clear polish to the center of each bloom to create a raised “dewdrop” effect. The watercolor technique is forgiving—imperfections actually enhance the artistic, handpainted quality of this design. easy spring nails.
05 of 21
3D Dewdrop Mismatched Mani
Celebrate spring morning dewdrops with this three-dimensional design that’s easier than it looks. Apply a base color of your choice (soft greens and blues work beautifully), then use clear topcoat to create small, raised droplets across your nails. Place them randomly for a natural effect. When light hits these transparent droplets, they reflect and refract, mimicking actual morning dew on spring leaves.easy spring nails.
06 of 21
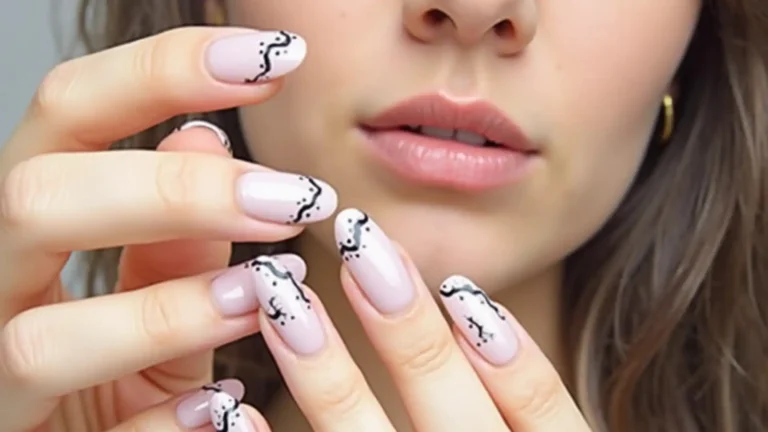
Abstract Cornflower Nails
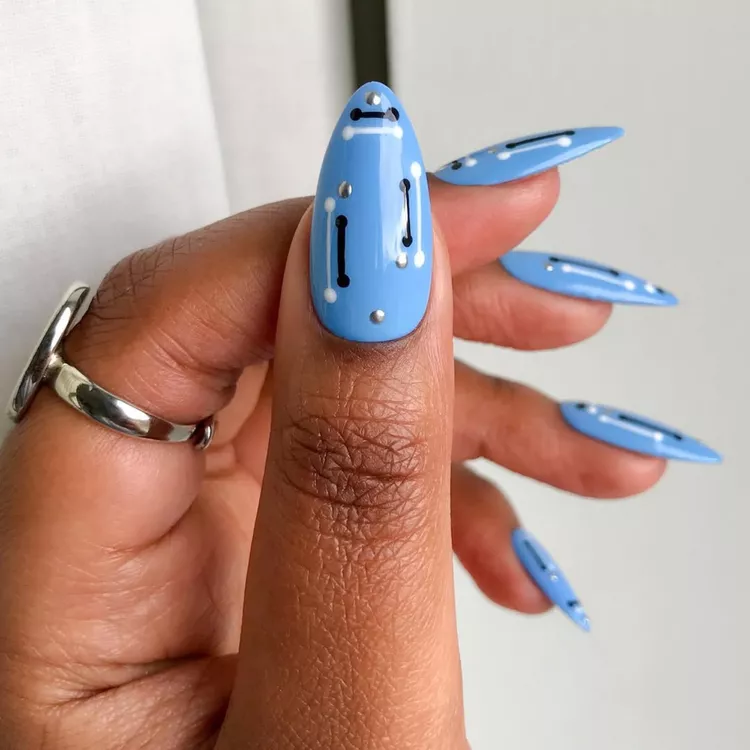
Cornflower blue captures spring’s clear skies in a wearable shade that flatters everyone. Apply this vibrant yet soft blue as your base, then use a thin brush to add simple white and black curved lines or dots for an abstract effect. The beauty of abstract designs? There’s no “wrong” way to do them—your imperfect lines become part of the artistic expression.easy spring nails.
07 of 21
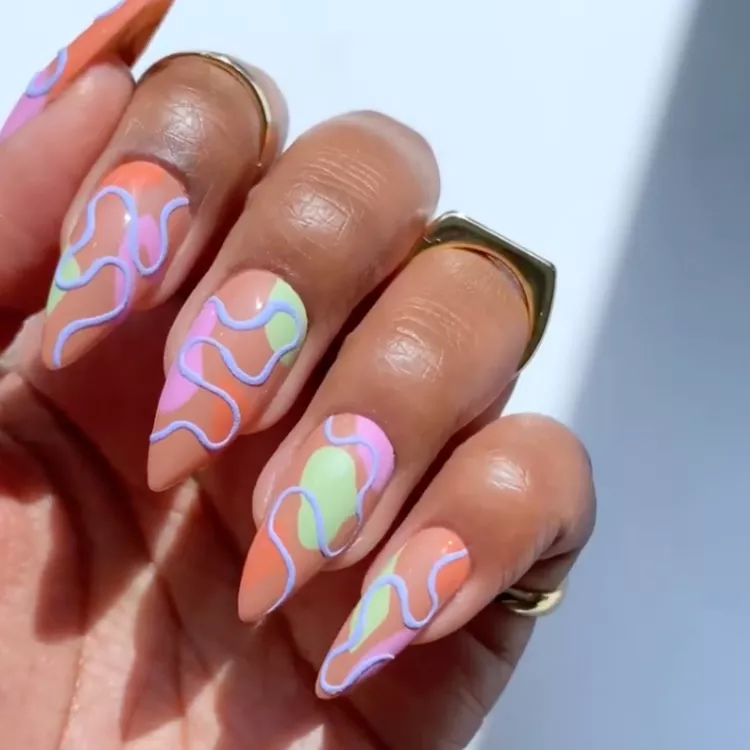
Ombré Pastel Swirl Nails
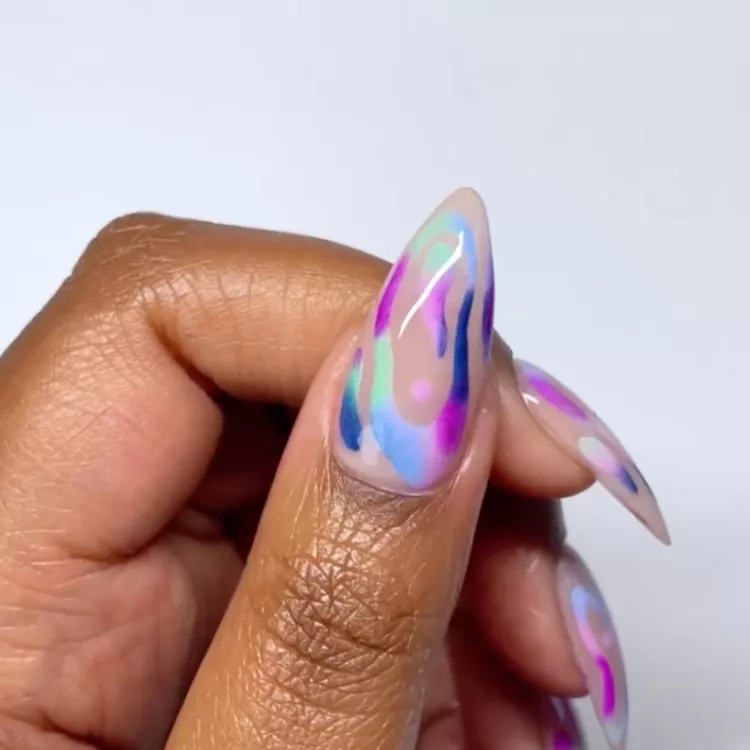
Combine two spring trends—ombré effects and swirl patterns—for a manicure that looks professional but requires minimal skill. Apply a light base color, then use a small makeup sponge to dab a gradient of two complementary pastels from cuticle to tip. While still slightly tacky, use a toothpick to create gentle swirls through the gradient. The colors will blend and swirl naturally, creating a watercolor effect that’s perfectly imperfect.easy spring nails.
08 of 21
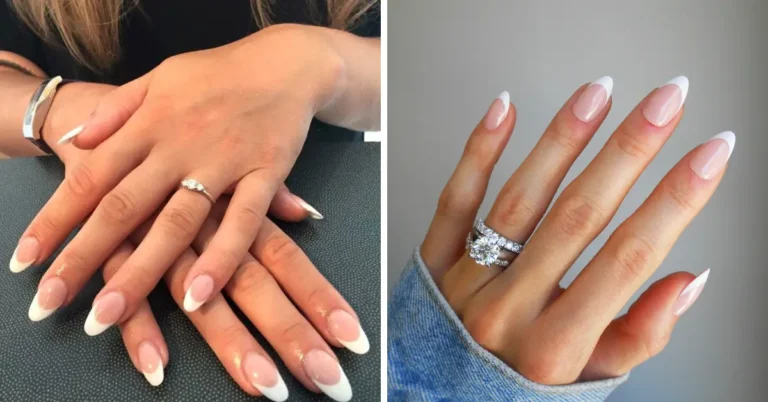
Art Deco Green and White French Tips
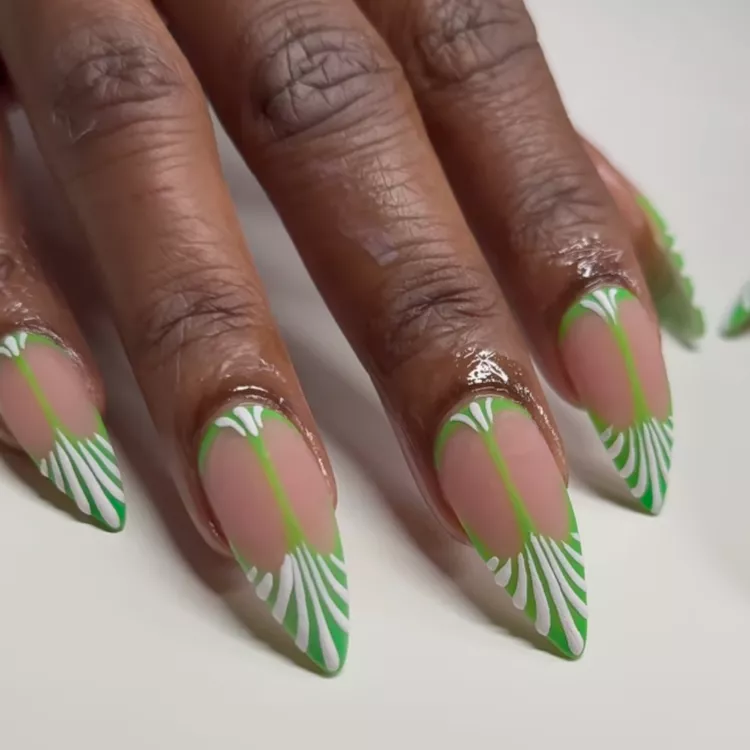
Reimagine the classic French manicure with an art deco spring twist. Create a traditional French manicure with white tips, then use a thin brush to add vertical green lines extending from the tip toward the cuticle. Add small geometric shapes like triangles or diamonds in green to complete the art deco effect. This design works particularly well on longer nails where the pattern has room to develop.easy spring nails.
09 of 21
Bedazzled Strawberry Milk Nails

Strawberry milk nails—a sheer pink with subtle milky undertones—provide the perfect spring backdrop. Apply two coats for a translucent finish, then use nail glue to attach a few carefully placed rhinestones or pearls near the cuticle. The placement need not be perfect; a random scattering of gems creates a delicate, dew-kissed effect that captures spring’s sparkling morning light.
10 of 21
Blinged-Out Bubblegum Pink Stiletto Nails
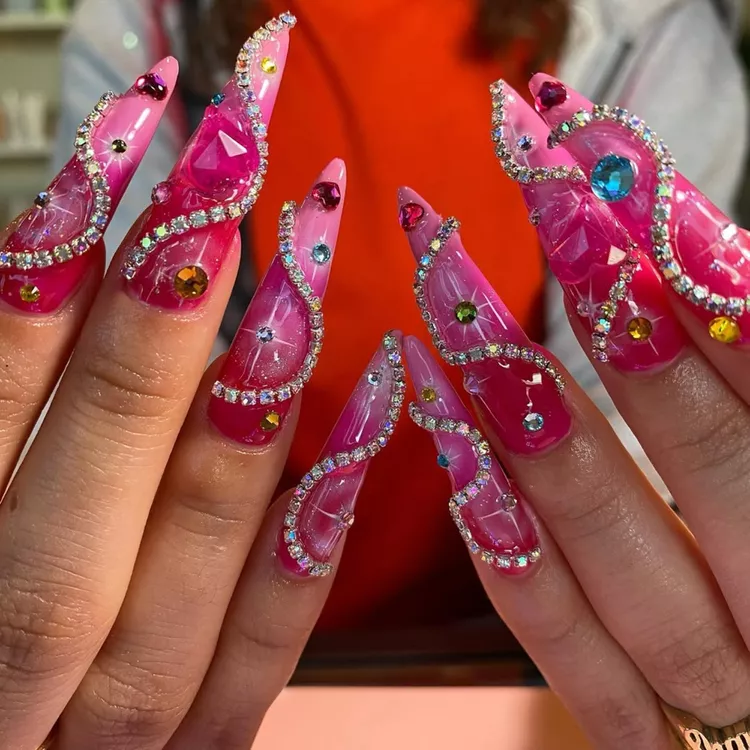
For those special spring occasions, bubblegum pink creates a bold seasonal statement. This vibrant shade works beautifully on longer stiletto shapes, where the color can truly command attention. Add dimension with strategically placed rhinestones clustered at the base, or create a gradient effect with stones becoming more sparse toward the tips. Despite its dramatic appearance, this look requires only basic placement skills.
11 of 21
Cheerful Rainbow Daisy Nails
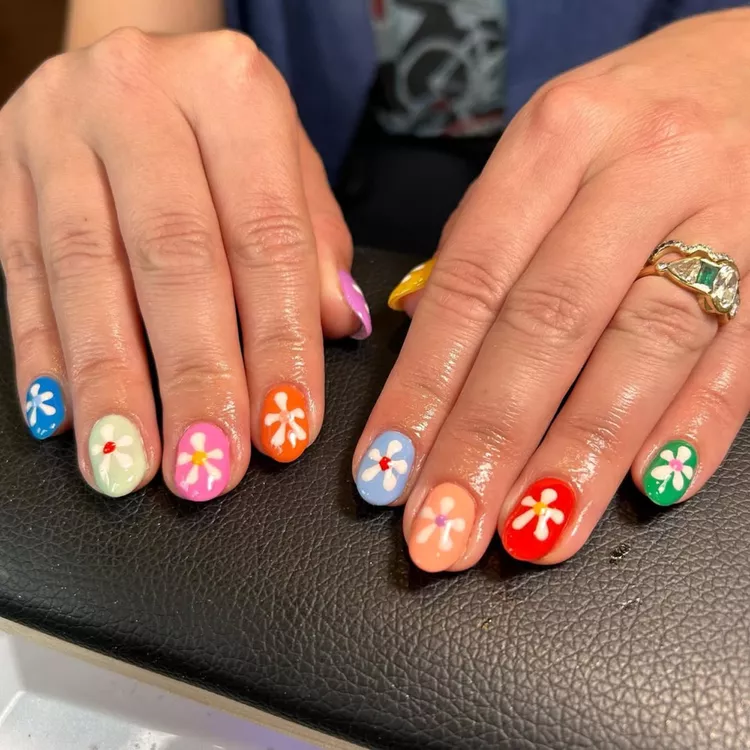
Short nails become the perfect canvas for spring’s cheerful daisies. Start with a different pastel base on each nail—think yellow, pink, blue, green, and lavender. Once dry, use a dotting tool to create simple white daisies: five or six dots arranged in a circle with a yellow or contrasting center dot. The multicolored base makes each flower unique while the consistent daisy pattern ties the look together.easy spring nails.
12 of 21
Colorful Spring Confetti French Tips
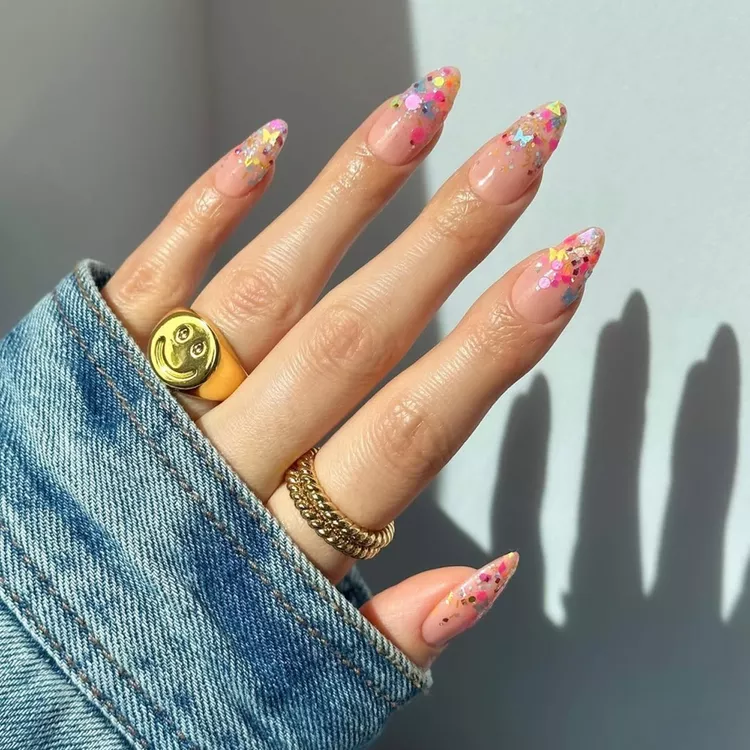
French tips get a playful update with this confetti-inspired design. Apply a clear or nude base, then use a small brush to paint traditional French tips in white. While still wet, dip a toothpick into various spring colors and dot them along the white tip to create a confetti effect. Alternatively, use a premixed confetti topcoat just on the tips for an even easier approach. Seal with topcoat to smooth the surface and ensure longevity.easy spring nails.
13 of 21
Dual-Finish Lavender Nails

Create visual interest through contrasting textures rather than complex designs. Apply two coats of lavender polish, then use a matte topcoat on half of each nail (either horizontally or diagonally split). The contrast between glossy and matte finishes creates a subtle effect that looks sophisticated yet requires no artistic skill—just careful application along the division line.easy spring nails.
14 of 21
Nostalgic ’90s Pastel Checkered Nails
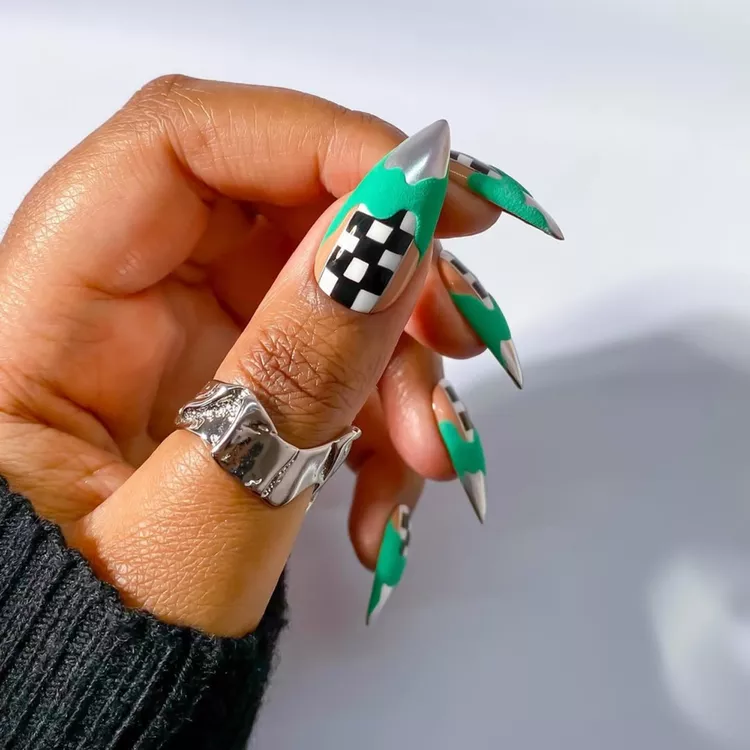
Checkered patterns offer a perfect blend of nostalgia and spring freshness. Choose two complementary pastels like mint green and baby blue. Apply your base color, then use striping tape to create a grid pattern. Paint your second color over the entire nail, then remove the tape while the polish is still slightly wet. The result is a clean checkered pattern that celebrates both ’90s style and spring’s playful palette.easy spring nails.
15 of 21
Green and Cream Spring Mani
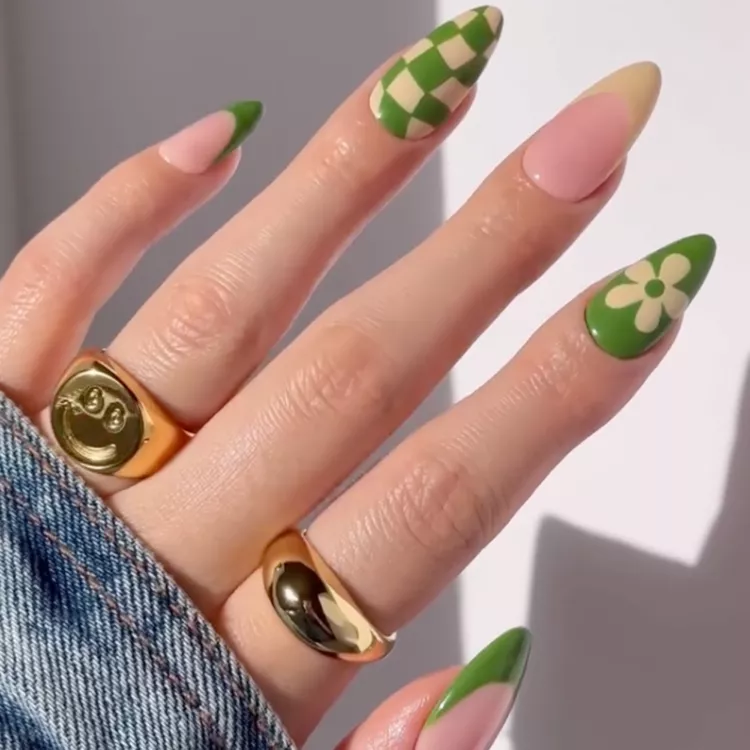
Embrace spring’s natural palette with this two-tone approach. Apply matcha green to some nails and buttercream to others, creating an alternating pattern. For additional interest, add a single thin stripe of the opposite color across each nail. This simple colorblocking technique requires only basic polish application skills while delivering a coordinated, seasonal look that feels fresh and intentional.easy spring nails.
16 of 21
Hot Pink Floral Bling Nails
@statementnails / Instagram Make a bold spring statement with vibrant hot pink—a color that captures the season’s vibrant energy. Apply two coats for optimal coverage, then add dimension with strategically placed floral rhinestones or stickers. Clustering these embellishments at the base of one or two accent nails creates focal points without overwhelming the design. A matte topcoat provides modern contrast to the sparkly elements.
17 of 21
Textured Iridescent Pink and Purple Aura Nails
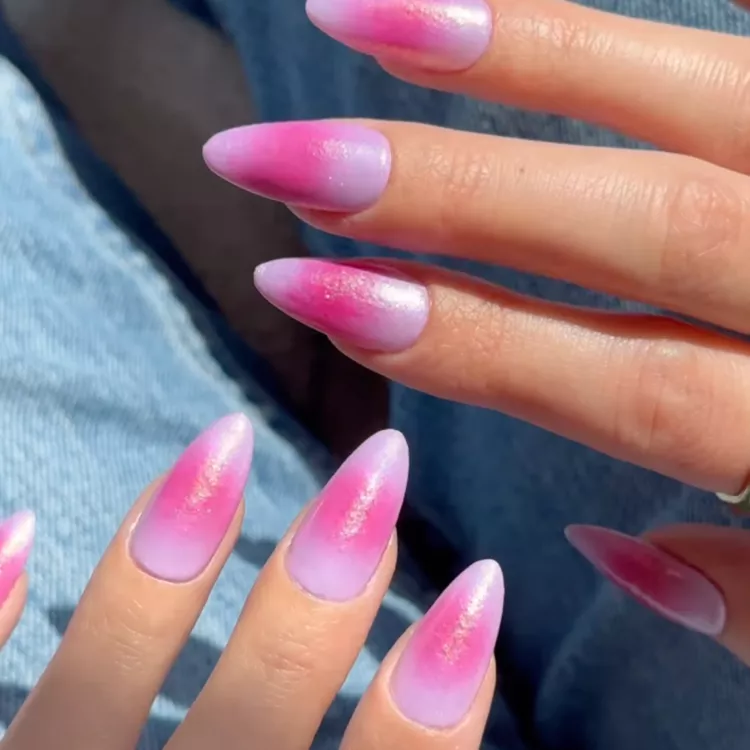
Aura nails mimic the ethereal quality of spring light with their glowing, diffused color transitions. Apply a white base, then use a small makeup sponge to dab iridescent pink polish at the center of each nail. While still wet, use the same technique to apply purple around the edges, allowing colors to blend where they meet. This creates a luminous “aura” effect that looks complex but requires only basic sponging techniques.easy spring nails.
18 of 21
Textured Pastel Swirls
Create dimensional interest with simple raised swirls on a spring pastel background. Apply your base color (periwinkle works beautifully for spring), then use a contrasting polish with a slightly thicker consistency to create a single curved line across each nail. The natural thickness of the polish creates subtle texture without requiring special tools. The irregular, hand-drawn quality of the swirls adds artistic character to this easy design.easy spring nails.
19 of 21
Vintage Floral Pastel Velvet Glass Nails
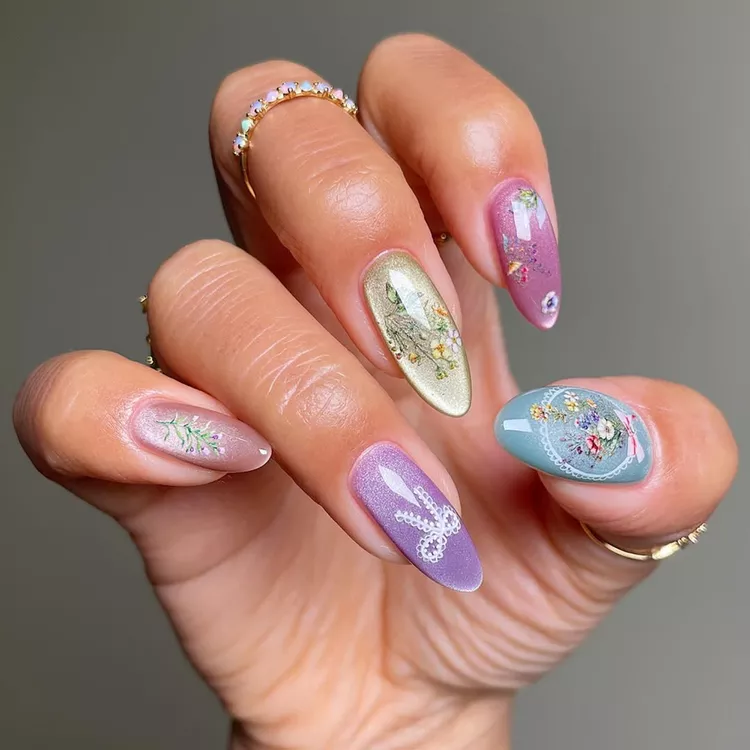
Velvet glass nails combine two trending textures in one easy technique. Apply a magnetic “cat eye” polish in your favorite spring pastel, then hold a magnet over each nail to create the velvet effect. Once dry, use a small brush to add simple flower outlines in white—just five small petals around a central dot. The contrast between the textured background and crisp white florals creates vintage charm without demanding advanced skills.easy spring nails.
20 of 21
Watercolor Garden Rose Nails
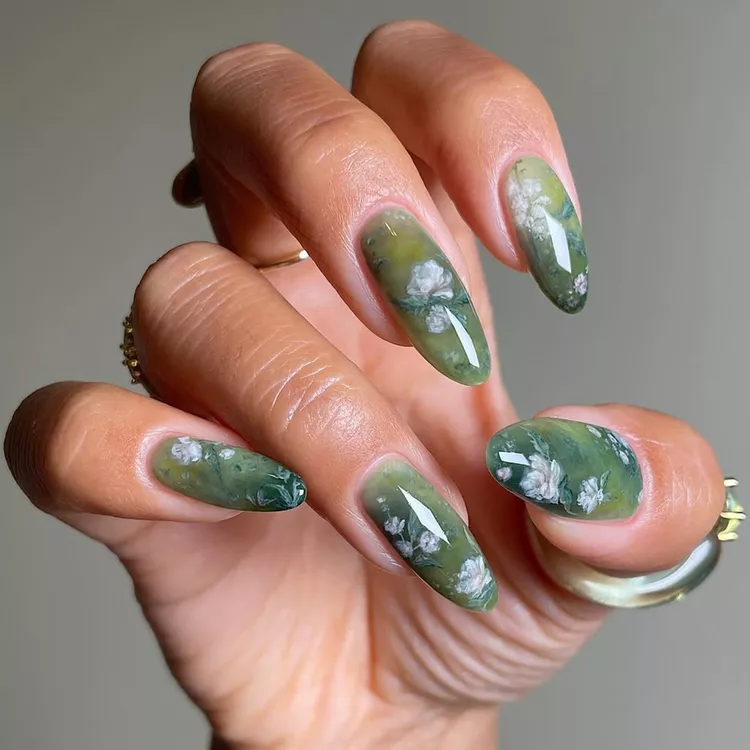
Channel spring gardens with a watercolor technique that’s forgiving for beginners. Apply a white base, then use a thin brush to place small dots of diluted green, pink, and yellow polishes close together on the nail. While still wet, gently tap with a small piece of plastic wrap to blend the colors together, creating a diffused watercolor effect. Add small white dots or lines to suggest flower details once dry.easy spring nails.
21 of 21
Wildflower Bouquet Nails
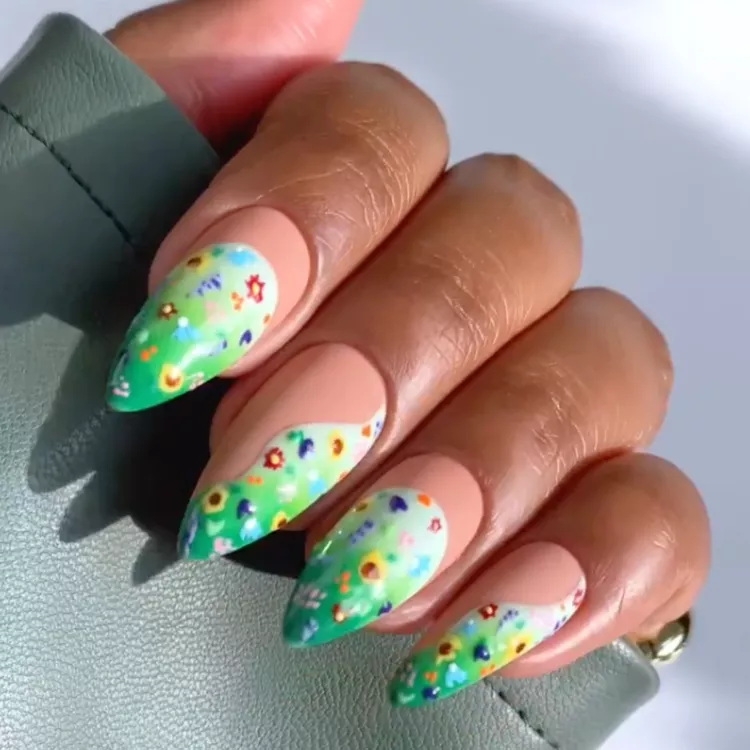
Celebrate spring’s wild beauty with scattered mini florals on a gradient base. Create a soft green ombré effect by sponging polish from tips to middle, leaving the base area lighter. Once dry, use a dotting tool to create tiny flowers in various spring colors—small clusters of dots work perfectly. Add small green lines to suggest stems and leaves. The random placement and varying colors capture the untamed beauty of spring wildflowers.
Remember, spring nails should feel fresh and effortless—embrace imperfection and have fun experimenting with these easy techniques. With basic tools and these simple designs, you can create salon-worthy spring manicures right at home.easy spring nails.
Find out more:
Follow us on: Pinterest | Facebook
44 Spring Nail Art Designs To Try